Using Custom Post Types To Manage Events
By default, WordPress holds and displays different content types like posts, pages, attachments and so on. However, you can also create a wide collection of custom content types tailored to your specific needs. These custom content types are called as “Custom Post Types” in WordPress.
Many beginners often mistakenly consider Custom Post Type the same thing as WordPress blog posts, because of the use of term “Post” in the name. However, you should replace “Post” with “content”. This is simply because Custom Post Type allows creating custom content. For instance, let’s say, you’re running a movie review website then a greater possibility is that you may want to create a movie review post type with many different custom fields for displaying:
- name of the users posting the reviews,
- date when the reviews were posted, etc.
You can create as many custom post types as you like based on your requirements.
In this post, we will talk about the process of creating a custom post type to create events.
How to Create Custom Event in WordPress?
Creating custom event in WordPress comprises of following steps:
Step 1 – Register a Custom Event
The very first thing we need to do is to register our custom post type (i.e. Event) with WordPress. For doing so, simply add the following code snippet at the end of your theme’s functions.php file, and prior to the closing PHP tag:
add_action(‘init’, ‘events_init’);
function events_init() {
register_post_type( ‘events’ ,
$args = array(
‘labels’ => array(
‘name’ => __(‘Events’),
‘singular_name’ => __(‘Event’),
),
‘public’ => true,
‘rewrite’ => array(“slug” => “events”),
‘supports’ => array(‘thumbnail’,’editor’,’title’,’custom-fields’)
);
}
Let us now see how the code works:
This code is creating a post type named Event identified as events. The register_post_type() function is used for adding a custom post type to WordPress. In the above example, this function receives four major arguments. Each of these arguments contains a certain meaning to it:
- labels: It tells WordPress what functions of the event post type should be called.
- public: This argument is set to ‘false’ by default. But in order to make your post type visible on the admin screen and show it up in the website content, you’ll have to set its value to ‘true’.
- rewrite: It defines the permalink structure of the post type.
- supports: this argument allows you to determine the meta boxes and custom fields that will appear in your back end screen when making edits to the custom post type ‘Event’.
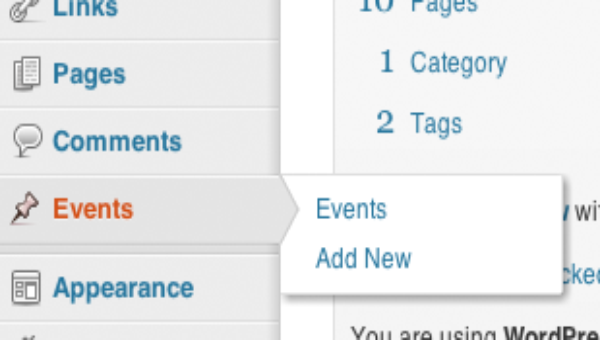
After pasting the above code snippet in your functions.php file, you just need to reload your admin dashboard and you’ll notice that a new events section will be added to the sidebar of your website dashboard that will look something like:
Step 2 – Creating a Page to List Events
Next, you simply need to add a few events to your new custom post type. In order to do so, you’ll have to create custom field named as ‘date’ that will determine when the event will occur (as shown in the screenshot below).

Remember to use custom fields for specifying event’s date instead of allowing system to fetch a date randomly (which is ideally similar to the publishing date of the post).
Once you’ve finished adding some events in your WordPress blog, you may want them to be listed at some appropriate location. For this purpose, you can create a dedicated page that lists all of your events, for example, create an “Event Listing Page” that can be added to each web page in your website like “About Us”, “Products”, “Contact” and other pages, by following the below mentioned key points:
- Create a copy of your theme’s index.php or page.php
- Assign a new name to the copy, such as new-custom-events-template.php or something you like.
- Now, open the new-custom-events-template.php file and simply copy and paste the following code in the beginning:
<?php
/**
* Template Name: Events Page
*/
?>
After adding the above code in your new custom post template file, look out for the line of code that looks something like:
<?php if (have_posts()) : while (have_posts()) : the_post(); ?>
And then, prior to the above line of code, add the following code:
<?php query_posts( ‘post_type=events’); ?>
In this code, we have created a new query, to which some additional attributes are added to make it the new event post type.
Step 3 – Using ‘Events Listing’ Page Template
Finally, in order to use the newly created template page, you’ll first have to create a new page. Assign a name to that page according to your requirement and select that page template from page attributes box. And then, publish the newly created post type to make your custom event noticeable to the users in the front-end.
To display events on the basis of their scheduled date, rather than the published date simply replace the query with the code as follows:
<?php query_posts ( ‘ post_type=events&meta_key=date&orderby=meta_value&order=ASC’); ?>
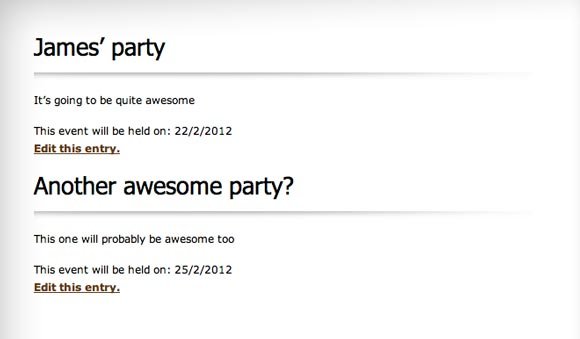
What’s more? In order to display your event date in your original post, you’ll have to add the following code snippet just after the_content() function within your page template:
<?php
$date = get_post_meta($post->ID, ‘date’, true);
if ($date){
echo ‘This event will be held on: ‘.$date;
}
?>
Output:
Wrapping Up!
Here’s hoping that this post will act as a handy guide to help you better understand the process of creating event lists using custom post types in WordPress.
Author Bio – Sarah Parker is an experienced PSD to WordPress service provider, and a web designer. She loves to share her thoughts on web design and web development trends.

