Opacity Tips in Illustrator
Most designers lean towards Illustrator or Photoshop, depending on what your projects mainly consist of. For logos, designers tend to lean towards Illustrator. For design projects where designers have to create complex blends, they tend to use Photoshop. You can easily use brushes to blend colors. However, your blends can be vector based, and you can have semi transparent colors in every aspect of Illustrator, from solid color fills, to strokes, and even gradients. In this tutorial, I’ll show how some advanced opacity tips in Illustrator.

One of the most important things you’ll need to understand is how to use the Appearance Panel. This panel will give you easy control over the opacity of objects. This may not be true for gradients, but we’ll get to that later. Notice in the screenshot above that the stroke and fill are listed. If you click the triangle icon next to each, it will give you the separate opacity settings for each. Instead of controlling the opacity as a whole, you can control the opacity of the stroke and fill separately. If the stoke is set to center in the Stroke Panel, lowering the opacity will reveal part of the orange square below.
 When you click the opacity link, a transparency and settings panel pops up. This where you can lower the opacity of the stroke by itself. Notice how the orange is now visible behind the stroke.

Next, I created a square and set the gradient to green and yellow. You can drag swatches over the color pickers to make it easy. As is, the opacity setting at the bottom controls the opacity of the enter gradient as a whole. If you want to control the opacity of just one color, double-click either of the yellow or green color selections in the Gradient Panel.
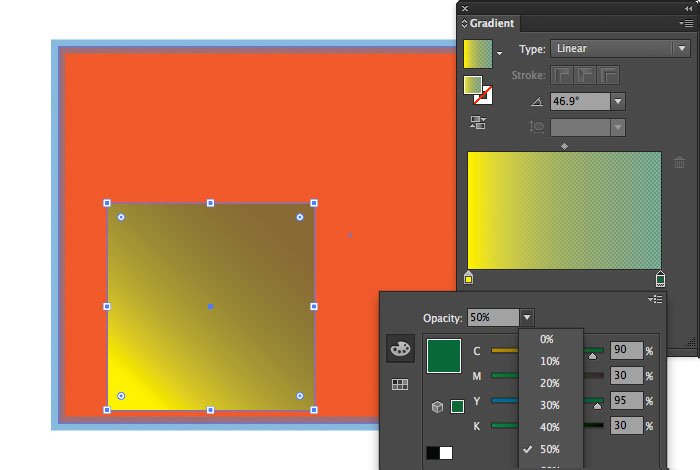
When you click one of the gradient color swatches, the panel pops up. This where you can lower the opacity of that color independently. Notice how the change is visible in the square and the in the Gradient Panel, too.
These extra settings give you total control over the opacity of everything you create. Whether you have multiple strokes, gradients, fills, and more, you can lower the opacity, making it transparent in the Appearance Panel. Your work will look much more realistic if you can control every aspect of your objects.
Do you have any questions or opacity tips in Illustrator? If so, feel free to share them in the comments section below.

